


Want to cosplay Peridot but don't know how to style a wig? Well, how about avoiding the hair altogether? pkloveboing has a fantastic tutorial on how to make Peridot's hair, but as a helmet instead! You can find all the details below the break.

Pic 1 - Making the cardboard form first. Cut out in the shape and size I want. Folded it down the middle. It goes right up to my hairline so there will be room for the gem and visor.

Pic 2 - I probably made this harder than it needed to be, but I made this ‘cross-section’ thing to show how far out in the back I wanted it to go. The edges mark the dimensions I want.

Pic 3 - After a lot of fiddling(this part took a long time), I got these four shapes by bending cardboard over the four back sides. Note that foam bends easier than cardboard. But this is now the ‘net’, ‘form’, ‘template’, whatever you’d call it.
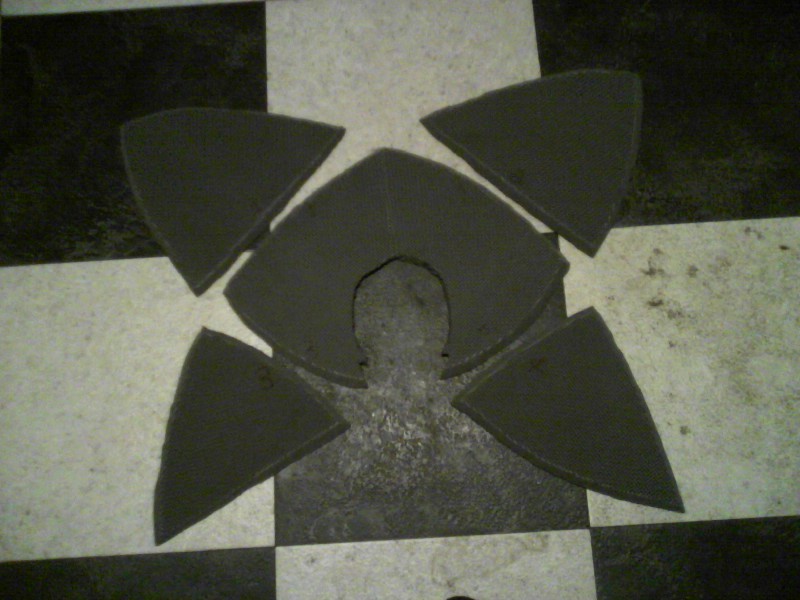
Pic 4 - Now I just traced all of the sides onto EVA half-inch foam and cut out with my scissors. (be sure to number the sides!) It is a little hard to see, but the middle of the front piece has a small‘channel’ or ‘wedge’ cut down the middle, so that it will hold its shape while bent. This can be done with an exacto-like blade. All of the edges are also cut at a 45-degree angle so that when they are glued together, it forms a 90-degree one.

Pic 5 - Hot gluing it together. This should be done SLOWLY and only small sections at a time. A bad-looking seam can’t be fixed and this is HARD to get right when working alone. If you have someone who can help you hold the pieces in place, or wipe off the excess hot glue it will help tremendously.
*ALTERNATE OPTION* Instead of hot glue, you can also use contact cement to bond it together. I honestly wish I had used this instead. Contact cement is brushed on and left to dry, and after 30 mins you can bond it together. No drips, accidental burns, or ugly seams. Just be careful because it will stick the INSTANT it touches itself. Line it up carefully and pinch the seams down nicely, and it will hold just as well, or possibly better, than hot glue.
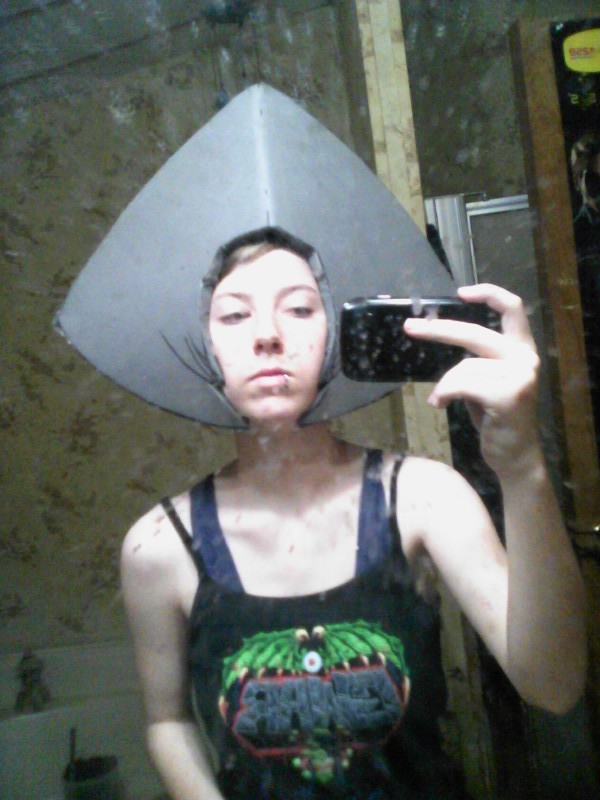
Pic 6 - Glued the other two sides on, glued the rest of the edges together, and cut out a hole to stick my head through.

Pic 7 - This was tricky and annoying to pull off with the rest of the headpiece already glued together. I glued foam scraps to the inside so that it stays in place in the right position. This would have beenMUCH easier if I had done it before gluing the bottom sides together. If you follow this guide, PLEASEtry and do this before completely sealing the sides up! It will save you much annoyance and possible hot glue burns!! ;-;
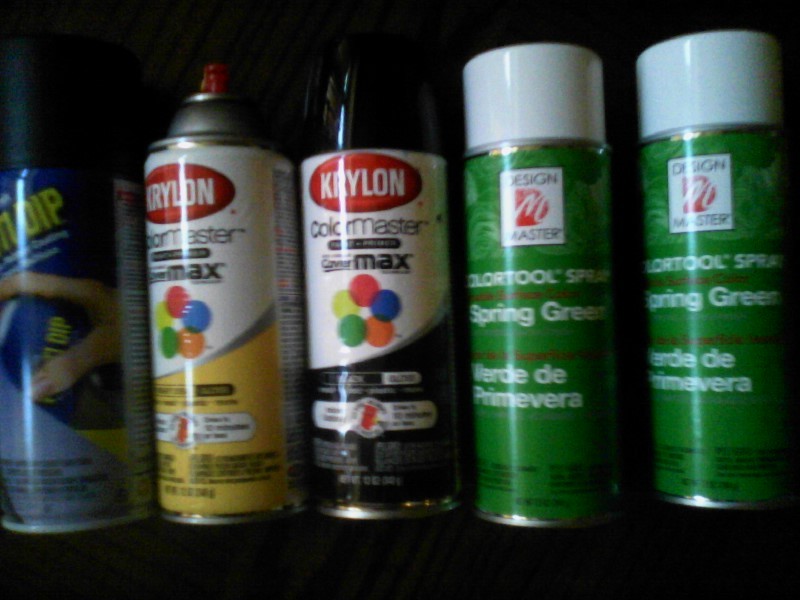
Pic 8 - Surface treatment, AKA PAINTING!! First, the whole thing is spray painted with Plastidip to seal the foam(keeps you from needing a bazillion paint coats). The Plastidip is the blue can on the far left, it is not expensive and can be found at Wal-mart just like actual spray paint, if not at Home Depot. The cap indicates color, and though I used black, I think white(if you can find it) would be better because yellow paint sucks by definition and white is easier to cover. Use a two-coat MINIMUM, more if you can. Four is great. I used this on all her other foam parts so I couldn’t use as much as I wanted. Get two cans if you can. Now, COLOR. I used Krylon’s gloss-finish Bright Idea. I won’t say it’s the perfect color, but it was the closest I could find. A matte-finish color won’t be glossy(so it’s up to personal preference). I also used this color for the various yellow diamonds on her. I only bought one can, but it was BARELY enough. Get two if you can. I still want to to go over it with another can. I didn’t seal it with a clear coat of anything because of my budget. If you can, go for it, more protection is always good.

Pic 9 - Here you can see how the visor + gem hold themselves in place through the miracle of tension.I have to pull it out before putting it on, but it slides in without a problem and will NOT just fall out while I’m wearing it.
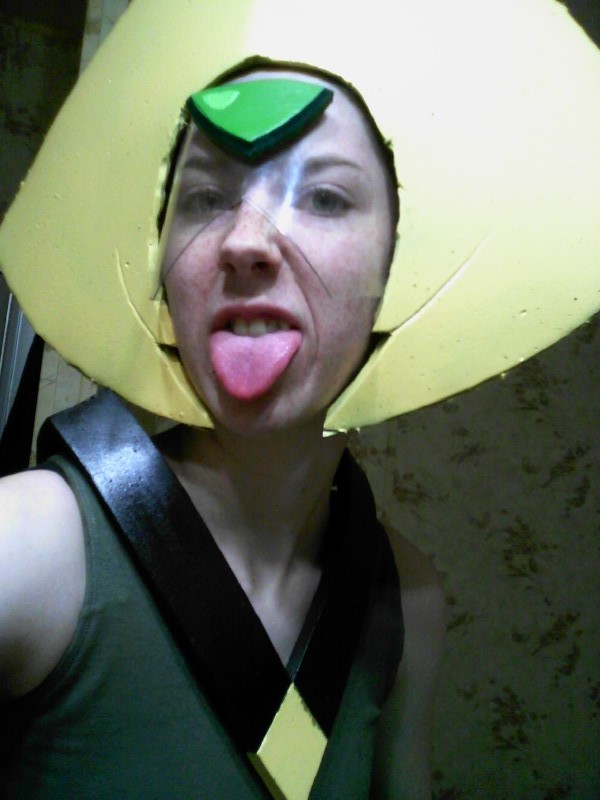
Pic 10 - Final product. It is far from perfect but I am still happy with it. It’s a little tricky to pull on, but is super snug and doesn’t really wiggle around. Sometimes it bends my ears funny, but that’s my fault. It only puts a slight hamper on my hearing, and though I’ve bumped into a couple things by turning my head, I’m pretty used to having slightly impaired mobility(I build and wear Transformers costumes) and it is easy to get used to. This thing will last me a long, long time.
If you’re still here thanks for reading! I hope I helped explain my process the best I can! There are lots of other equally awesome ways to make Peridot’s hair/headpiece but this is what I went with, based on my skillset and experience with foam. Choose whichever method works for YOU. This was probably the hardest part of Peridot to make. If you have any additional questions or want to see tutorial-styled posts for the other parts of making her, let me know.
Twitter: Emerald


